remotEMDR is a feature-rich platform with many options and customization possibilities for each one of its functions. After using the platform for some time, some users develop a personal set of preferences regarding these options, which they like to use often. To save time and effort recreating your customized set-up, we created Custom Presets and Custom Layouts. These allow you to save the settings you prefer for each client and even change the platform’s default layout according to your preferences. In this post, we’ll review these features and explain how you can easily set up your own layout and presets.
Creating and Saving Custom Presets
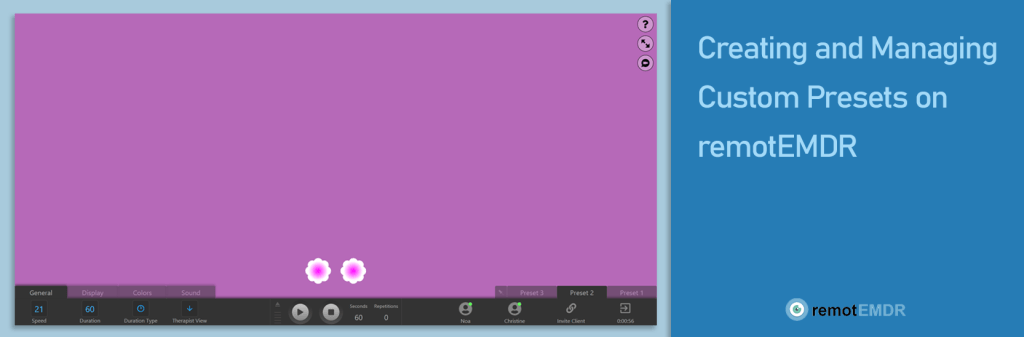
remotEMDR’s presets option enables you to choose a customized set of session screen settings for each one of your clients. This way, you don’t have to choose your preferred settings again on each new session: you just save them under a preset, and they’ll be ready to use on all of the client’s future sessions.
This is how they work:
When you start a session with a new client, the screen will have no presets at all and will be set to the platform’s default setting options. Once you make any change to the default settings, a new preset will be added to the screen automatically, titled “preset 1”. When you click the “End Session” button, all of the settings you’ve changed during the current session will be saved on the “Preset 1” tab. In the future, when you start a session with the same client, these settings will remain as you’ve set them on this tab.
The saved settings can include speed, duration, type, colors, sound, and any other changes you can make to the session screen’s settings. For more information on the platform’s available settings, go to the blog post about using the control panel.
You can add up to 3 presets per client by clicking the plus button. Click on each tab to access it and make changes to its settings. You can also give each preset a unique name by double-clicking it and typing the new name. Finally, to delete a preset, double-click its tab and then click the trash icon.
Creating and Saving a Customized Default Layout
To personalize your remotEMDR experience even further, you can create your own default session layout. Your default layout can include up to three different presets and will apply to each new client you add to your list.
To create your default layout, go to the platform’s main screen, and click the Profile Settings button. Then select “Default Session Settings.” A simulation of the Session Screen will now open, where you’ll be able to choose the settings for your personalized default layout. Choose up to three different presets and select the settings for each one. When you’re done, click Save and Close. From now on, whenever you add a new client to your list, their session screen will be set to the default layout you’ve defined for them.
Click below for a video tutorial on creating custom presets and a default layout.
