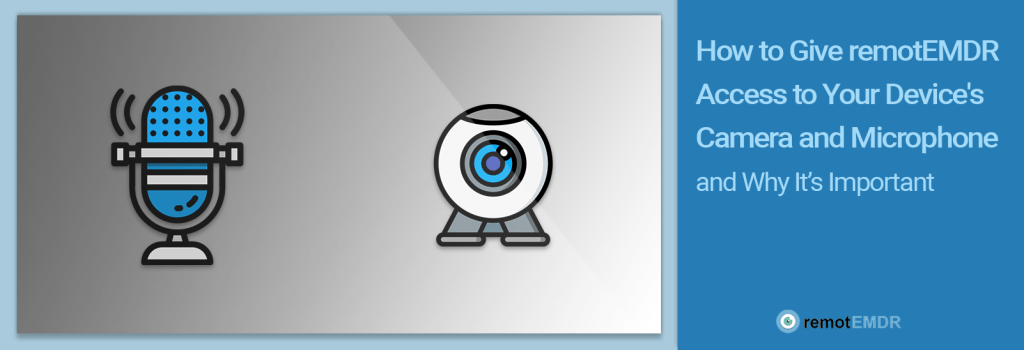
As part of its service, remotEMDR offers an internal HIPAA-compliant video chat, based on the browser on which it is used. To use the platform’s internal video chat, you first need to make sure that both you and your client have a functioning camera and microphone connected to your computers and that the browsers you are using have permission to access the camera and microphone on remotEMDR’s website. This blog post will explain the importance of giving these permissions and how you can easily grant them through your browser’s settings.
What Permissions are We Talking About?
To protect its users’ privacy, every internet browser comes with a set of security settings. These settings include the choice of whether to allow any website the user visits to use the camera and microphone on the user’s computer. Usually, there are three options regarding these permissions:
Allow – this means that any website can use the user’s camera or microphone.
Block – all websites are prohibited from using the user’s camera or microphone.
Ask – every time a website tries to use the user’s camera or microphone, a pop-up message appears asking the user to decide whether they approve the usage or not.
What Happens If I Don’t Give remotEMDR Permission to Use My Camera and Microphone?
If remotEMDR does not have permission to use your computer’s devices, your client will not be able to see or hear you through remotEMDR’s internal video chat since your camera or microphone will not be able to function. The same applies if your client doesn’t approve their use on their side – you won’t be able to see or hear them.
Lack of access to the camera will also prevent remotEMDR from displaying the user’s thumbnail image next to their name in the session screen.
How Do I Give remotEMDR the Necessary Permissions?
Allowing remotEMDR access to your computer’s camera and microphone is very easy. All you have to do is make sure to follow the correct instructions, as they differ from browser to browser.
For a detailed explanation on allowing access in Chrome, click here.
For a detailed explanation on allowing access in Firefox, click here.
For a detailed explanation on allowing access in Safari, click here.
If you’re having any trouble giving your browser access to your computer’s devices, contact us at info@remotEMDR.com and we’ll be happy to help.
Whether you’re new to remotEMDR and would like to get to know it, or you’ve been using the platform for a while and want to make the most of it – this post is for you. remotEMDR’s control panel is where you can find and operate the platform’s key features, and getting to know it will undoubtedly help you benefit from the platform’s many customization options.
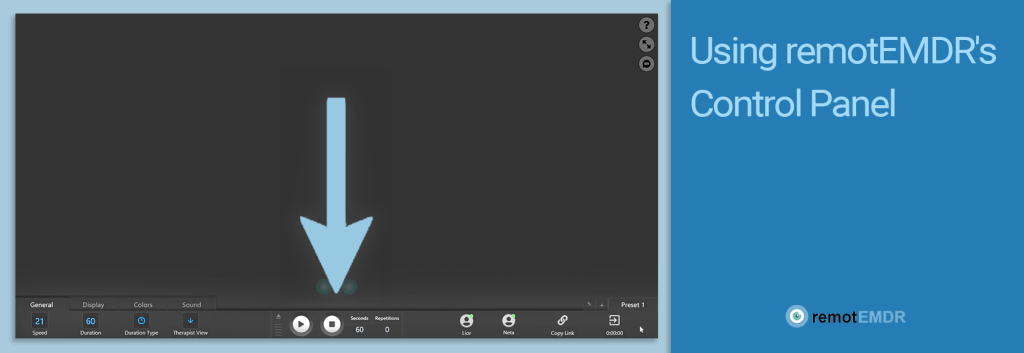
Located at the bottom of the session screen, remotEMDR’s control panel contains all of the buttons that control the platform’s BLS and its different features, as well as the Connectivityicons, the Copy Linkbutton, and the End Sessionbutton.
Before we dive in, please note that by default, the control panel will be minimized whenever you move your cursor away from it. If you would like the control panel to remain open at all times,click the Pushpin icon, located near the screen’s bottom right corner.
Part 1: the panel’s central part – the detachable player
The control panel’s central part is actually a detachable player that can be removed from the main toolbar and moved freely around the screen. This way, you can maintain a full-screen display of the session screen but still have access to the platform’s basic functions while the main toolbar is closed.
To detach the player from the main toolbar, click on the small triangle at its upper left corner. You can now drag and drop the player around the screen and rotate it horizontally and vertically by clicking the circular arrow button.
To insert it back into the main control panel, drag the player down to the bottom of the screen and place it in the middle of the panel. Once you do that, it will snap back into place.
The Play button will start the BLS set, and the Stop button will end it (note that the BLS will only stop after completing its current repetition). Next to the Play and Stop buttons, you can see the time left for the current set and the number of completed repetitions.
Part 2 – the four tabs on the panel’s left side
General
In the General tab, you can determine the BLS speed and control each set’s duration. Choose the Infinity duration option for continuous motion.
The Duration Type button will allow you to choose whether to set the BLS duration by the number of seconds or by the number of repetitions.
Last on this tab is the Therapist View button. remotEMDR’s default Therapist View has the visual elements located at the bottom of the screento allow for an optimal view of the client throughout the entire session.However, if you don’t wish to see the visual BLS at all, you can change the therapist’s view to No Visual Elements. If you would like to see exactly what your client sees on their side, choose the Client Perspective option.
Display
First on the display tab is the Type button, which lets you choose between several types of visual stimuli: Horizontal and Vertical Scan, Diagonal scan, Horizontal and Vertical Saccade, Infinity Symbol,Reverse Infinity Symbolor Sound Only – with no visual BLS at all.
The Height button lets you determine the elements’ position on the screen: one is the lowest, and forty is the highest.
By clicking the Elements button, you can choose whether to display one visual element or two.
The Shape button allows you to choose the visual elements’ shape and size.
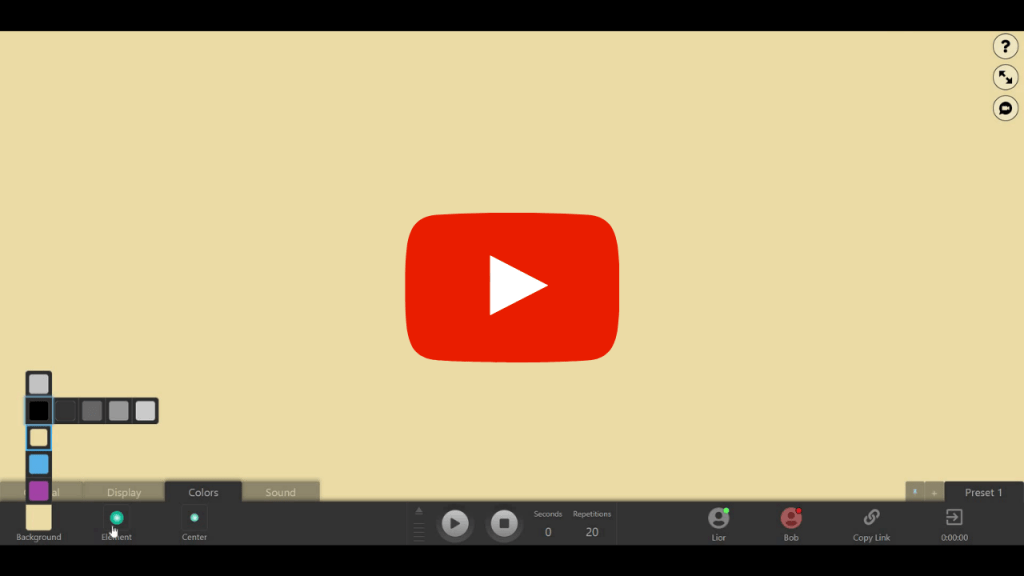
Colors
Here you can set the colors for the session screen’s background and the visual elements. You can change the colors for both the interior and exterior parts of the visual elements to suit your preference.
Sound
The Sound button enables you to choose who will hear the auditory stimulus when it is turned on. The default setting is “Client Only.” You can also choose to turn the sound off for both sides or on for both sides.
The Volume bar allows you to set the auditory stimulus’s volume. Forty is the loudest.
The Sound Type button lets you choose between three sets of sounds that can be played as auditory stimulus: Effect, Music, or Nature. After choosing your sound type, click the button on the right to view the list of music tracks or sound effects available in the set you’ve selected.
Part 3: the buttons on the right side of the panel
On the panel’s right side, you can find the connectivity icons, which indicate your and your clients’ connection status. A green circle indicates “connected”. A red circle means “disconnected”.
The Copy Link button will copy the session’s invitation link to your clipboard, so you can easily send it to your client.
Finally, we have the End Session button and the session duration timer located right underneath it. The timer will start running as soon as the client joins the session and will indicate how much time has passed since it started.
Remember that all of your clients’ preferences as you’ve set them during this session will be saved automatically once you exit the session screen. Click here for a post on managing the session screen’s presets.
This was our review of remotEMDR’s control panel. Click below to watch this guide’s video version. For questions and support, contact us at info@remotEMDR.com.
In today’s fast-paced reality, we often find ourselves working outside our clinic or office and in need of quick and easy access to the tools we’re accustomed to. That is why we made sure that remotEMDR and all of its features works smoothly on mobile devices – smartphones and tablets – as well as computers. In this post, we’ll give you a few essential tips for using the platform on your mobile device so that you can benefit from it wherever you are, whenever you need it.
A couple of notes before we start – first, remember that to access remotEMDR, you must use Chrome, Firefox, or Safari browsers only. If you’re using an iPhone or an iPad, please use Safari only.
Second, please ensure your mobile device’s operating system and your browser are both up to date before starting your remotEMDR session.
Finally, please remember that remotEMDR’S mobile version only works with the platform’s internal video-chat or with Doxy.me.
Starting a remotEMDR Session on Mobile Devices
In general, remotEMDR’s mobile version is quite similar to the desktop version.
To start a new session, sign in to the platform and then tap the Start Session button next to your client’s name.
When you enter the session screen, you’ll be prompted to rotate your device to vertical mode. If rotating the device does not affect the screen’s orientation, go to the device settings and enable the auto-rotate option.
For a better remotEMDR experience on mobile devices, we recommend activating the pushpin option and choosing the full-screen mode.
Last, you can also use your mobile device as a remote control while you’re using the platform in in-person sessions. More on this subject in an upcoming post. Stay tuned!
Click below for a video tutorial on using remotEMDR on mobile devices.
remotEMDR goes beyond visual stimulous and provides users with a wide range of features and options for auditory stimulous as well. This post will explore the platform’s key auditory stimulous features and explain how to use them.
Most of the platform’s auditory stimulus options are available in the Sound tab:
The Sound button enables you to choose who will hear the auditory stimulus: Client Only (the default setting), Sound Off, or Sound On for both you and your client.
The Volume bar lets you set the auditory stimulus’s volume (1-40).
The Sound Type button lets you choose between three sets of sounds that can be played bilaterally as auditory stimulus: Effect (e.g. ping-pong, bell, and chopping), Music (unique bilateral music tracks), Nature (e.g. rain, wind, and flowing river). Click the button on the right of the Sound Type button to view the list of music tracks or sound effects available in the set you have selected.
More auditory stimulous option can be found in the Display tab:
In remotEMDR, you can choose whether to use the auditory stimulus by itself or together with the visual stimulus (the platform’s default option). If you choose to operate both simultaneously, the two types of stimuli will be fully synchronized with each other. If you prefer to use the auditory stimulus alone, click on the Display tab and change the type to Sound Only.
*Please note that for the auditory stimulus to be effective, it is recommended that your client uses wired headphones during this part of the session.
Click below for a video tutorial on using remotEMDR’s auditory stimulous and its features.
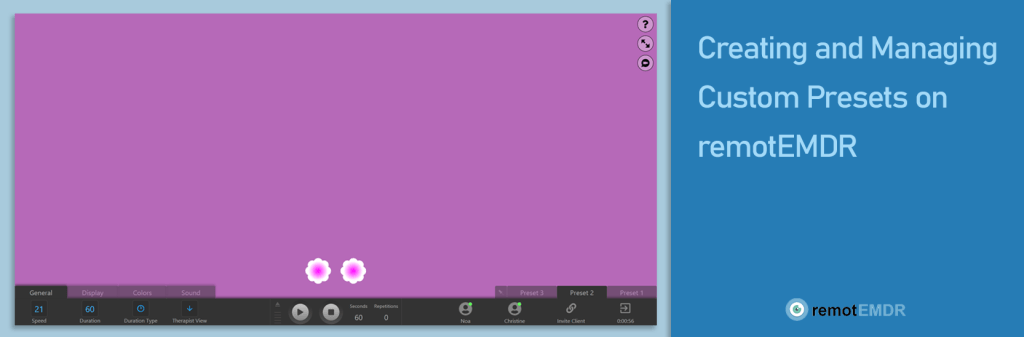
remotEMDR is a feature-rich platform with many options and customization possibilities for each one of its functions. After using the platform for some time, some users develop a personal set of preferences regarding these options, which they like to use often. To save time and effort recreating your customized set-up, we created Custom Presets and Custom Layouts. These allow you to save the settings you prefer for each client and even change the platform’s default layout according to your preferences. In this post, we’ll review these features and explain how you can easily set up your own layout and presets.
Creating and Saving Custom Presets
remotEMDR’s presets option enables you to choose a customizedset of session screen settings for each one of your clients. This way, you don’t have to choose your preferred settings again on each new session: you just save them under a preset, and they’ll be ready to use on all of the client’s future sessions.
This is how they work:
When you start a session with a new client, the screen will have no presets at all and will be set to the platform’s default setting options. Once you make any change to the default settings, a new preset will be added to the screen automatically, titled “preset 1”. When you click the “End Session” button, all of the settings you’ve changed during the current session will be saved on the “Preset 1” tab. In the future, when you start a session with the same client, these settings will remain as you’ve set them on this tab.
The saved settings can include speed, duration, type, colors, sound, and any other changes you can make to the session screen’s settings. For more information on the platform’s available settings, go to the blog post about using the control panel.
You can add up to 3 presets per client by clicking the plus button. Click on each tab to access it and make changes to its settings. You can also give each preset a unique name by double-clicking it and typing the new name. Finally, to delete a preset, double-click its tab and then click the trash icon.
Creating and Saving a Customized Default Layout
To personalize your remotEMDR experience even further, you can create your own default session layout. Your default layout can include up to three different presets and will apply to each new client you add to your list.
To create your default layout, go to the platform’s main screen, and click the Profile Settings button. Then select “Default Session Settings.” A simulation of the Session Screen will now open, where you’ll be able to choose the settings for your personalized default layout. Choose up to three different presets and select the settings for each one. When you’re done, click Save and Close. From now on, whenever you add a new client to your list, their session screen will be set to the default layout you’ve defined for them.
Click below for a video tutorial on creating custom presets and a default layout.
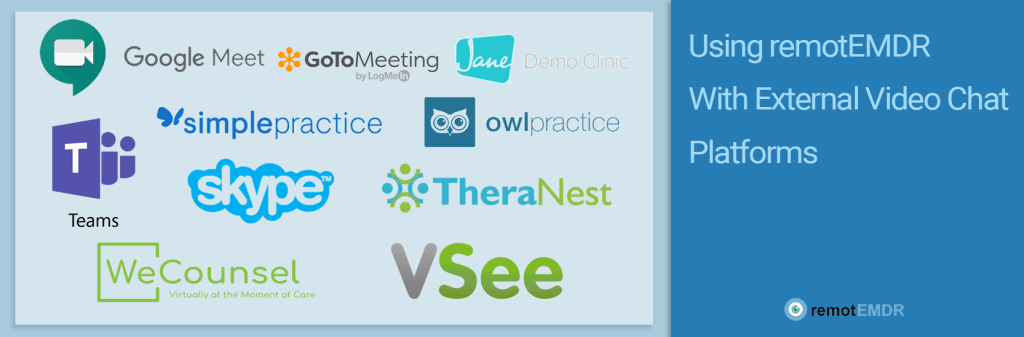
In addition to having its own advanced internal video-chat, remotEMDR works seamlessly with most external video-chat platforms, including SimplePractice, WeCouncel, Google Meet, and many more. Apart from two exceptions (Zoom and Doxy.me), you can follow these simple steps to set up your remotEMDR session with any external video-chat platform:
Open Chrome, Firefox, or Safari browsers (iOS users – please use Safari only).
Sign in to the external telehealth video-chat platform and start a new session.
Open a new tab on your browser and sign in to remotEMDR.
Invite your client to join the remotEMDR session, and click the Start Session button next to their name on the client list (found on remotEMDR’s main page).
Once your client joins the session, a pop-up message will appear, prompting you to choose a video-chat platform. Close this message by clicking the small X button in its top-right corner.
Click on the pushpin icon on the control panel’s upper right side to ensure the control panel stays open throughout the session.
Split the external video-chat platform and remotEMDRs’ tabs into two separate windows. You can do this by either right-clicking on one of the tabs and selecting “move tab to a new window” or simply clicking on one of the tabs and dragging it down.
Click the restore down (-) icon at the upper right corner of the window. If you are using a Mac computer, look for the green button instead.
Adjust the window’s size by clicking and holding the window’s border and moving it with your mouse.
To move the window around your screen, click and hold the top bar and move it with your mouse. This way, you can locate the remotEMDR window at the bottom part of your screen.
Do the same with the video-chat platform’s window – click the restore down button, adjust the window’s size, and move it to the top part of your screen.
Now you have a simultaneous view of both platforms, so you can see your client and operate the BLS at the same time. You’re ready to start your session!
For a video tutorial on using remotEMDR with external video-chat platforms, click below.
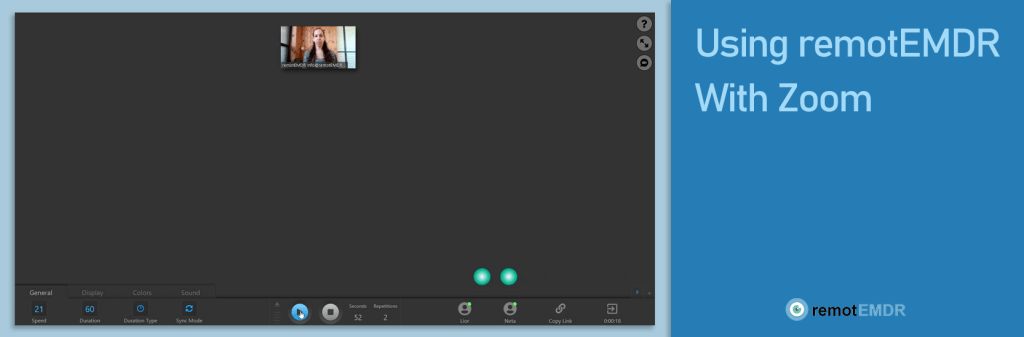
remotEMDR works seamlessly with Zoom, and you can easily enjoy the benefits of both platforms in each one of your sessions. Follow these steps to set up a Zoom/remotEMDR within minutes:
Setup (before the therapy session)
First, open your Chrome, Firefox, or Safari browser (iOS users – please use Safari only).
Log in to remotEMDR.com using your email address and password.
On the platform’s main page, select a client from the client list, or add a new listing by clicking the Add Client button.
Send your client an invitation link to the remotEMDR session. Click here for a step-by-step video guide on inviting your client to a remotEMDR session.
Starting the therapy Session
Start the Zoom session.
Minimize the Zoom screen by clicking the minus sign on Zoom or the yellow icon if you’re using a mac computer.
Go back to remotEMDR by clicking on the browser icon. Zoom will now appear inside a small window at the top of the remotEMDR window.
Start a remotEMDR session by clicking the Start button next to your client’s name.
Ask your client to click the invitation link you have sent them.
Choose your preferred BLS settings and click the Play button. The BLS will start and run synchronously on your and your client’s computers, and you will be able to control them remotely from the remotEMDR control panel.
That is all – you’re ready to start your Zoom/remotEMDR session. Click below for a video tutorial demonstrating these steps.
remotEMDR offers Doxy.me users a unique solution, which allows them to connect the two platforms quickly and easily and benefit from both of them simultaneously in each session. In this post, we’ll explain how to set up a remotEMDR session with Doxy.me with a few simple steps.
Before we start, please note that to use remotEMDR with Doxy.me, you will need to know your personal room name. If you’re not sure what it is, log into Doxy.me and go to “Account Settings” and then “Room Settings.” You’ll find your room name there.
Follow these steps to start your next Doxy.me/remotEMDR session:
Start by opening a Chrome, Firefox, or Safari browser (iOS users – please use Safari only).
Go to www.remoteEMDR.com and sign in. On the platform’s main page, you will find your client list. To start a session with one of your clients, click the “Start Session” button next to their name.
Once your client joins the session, a pop-up message will appear, prompting you to choose a video chat platform. Click on “External Video-Chat” and then select
Doxy.me, or Doxy.me Clinic if you are using the platform’s premium version.
Next, enter your room name.
Now simply sign in to Doxy.me through the window embedded in remotEMDR’s session screen.
Once your client signs into Doxy.me, their name will appear on the patient queue. Click on the “Start Call” button, and you are ready to start the Doxy.me session within remotEMDR.
A couple of Useful Options:
You can adjust the embedded window’s size by clicking and holding its edge and moving it with your mouse.
You can also move the window around the screen by clicking and holding its top bar and moving it with your mouse.
Click below to watch a video demonstration of this process.
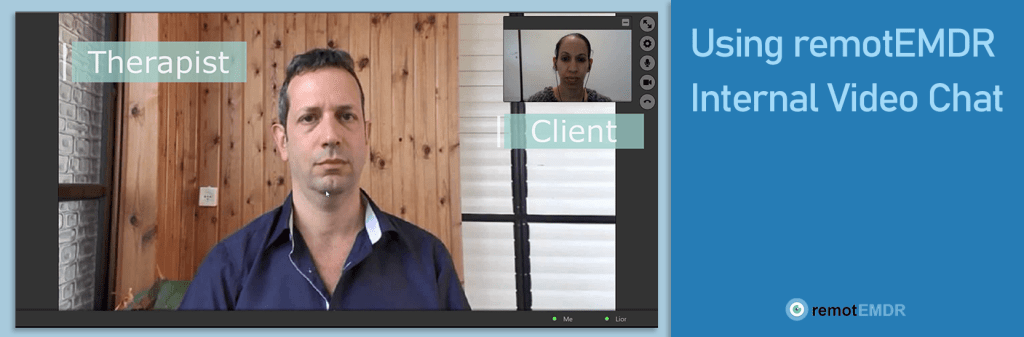
remotEMDR works very well with external video-chat platforms like Zoom or Skype, but it also has its very own advanced and easy-to-use video-chat with many unique and helpful features. Keep reading to learn how to use the platform’s internal video-chat and find out about its main benefits.
Setup (before the therapy session)
To use remotEMDR’s internal video-chat, start by going to http://www.remotEMDR.com through Chrome, Firefox or Safari browsers (iOS users – please log in through Safari only, and make sure the OS is 13 or above), and log into your account.
Second, make sure that both you and your client have a functioning camera and microphone connected to your devices and give your browsers permission to use them on remotEMDR’s website (Click on your browser’s name for instructions: Chrome, Firefox, Safari).
Make sure that another application on your device is not using the selected camera and microphone.
Finally, send your client an invitation link to the remotEMDR session.
You’re now ready to begin the session through remotEMDR’s internal video-chat.
Starting the Video Chat
On the platform’s main screen, click on the Start Session button next to your client’s name. Once your client joins the remotEMDR session, the red circle next to their name will turn green, and a popup message will appear, prompting you to choose a video chat platform.
If necessary, click the Video Chat Settings button to choose the microphone and camera you would like to use.
Click the Start remotEMDR Video-chat button to start the session, and wait for your client to accept the call.
You and your client will now be able to see and hear each other through the video chat, and the session can begin.
Operating the Video Chat
In this section, we will go over some of the internal video-chat’s key features:
During the session, you will have a full-screen view of your client and a thumbnail view of yourself at the screen’s top right corner. Your client will have a similar view. Both you and your client can drag and drop the thumbnail and locate it anywhere on the screen.
If you would like, you can minimize your thumbnail by clicking the minus button at the thumbnail’s top right corner. To bring it back up, click the plus button.
Once you turn on the BLS, your client will no longer see you and themselves but only the elements so that they can focus on their movement without distractions. Your view will remain the same as it was before. If you would like your client to keep seeing you while the BLS is active, click on the Settings icon and choose the “Show video to the client during the BLS” option.
Both you and your client can turn your cameras off and on again at any time during the session by clicking on the camera button. You can also mute or unmute your audio by clicking on the microphone button.
New – a share screen button: remotEMDR’s internal video-chat has a share screen option that is available on both sides of the chat – client and therapist. You can find the Share Screen button on the right side of the session screen.
Ending the Call
To end the internal video-chat call and exit the video-chat, click the Hang-Up button.
To reopen the internal video chat from the session screen, click the Video-Chat icon on the screen’s right-hand side and select remotEMDR internal video chat. Please note that this option will only be available while your client is connected.
Go back to remotEMDR by scrolling to the top of this page and clicking the Main Platform button to try the internal video-chat now. If you would like a visual demonstration, click below to watch our video guide on using the internal video-chat.
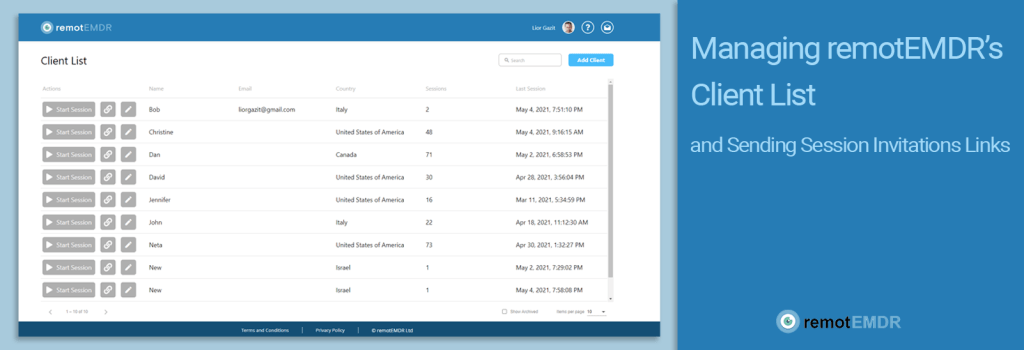
In this post, we’ll review remotEMDR’s client list – how to add a new client to it, how to edit an existing client’s details and how to delete a client from the list. We’ll also go over a quick and easy way to send your client an invitation to join a remotEMDR session. Let’s start with the client list.
Part 1 – Managing the Client List
Your client list appears on the platform’s main page – you will see it immideately once you log into your account. Here, you can add or remove clients from the list or edit exising client cards.
To use remotEMDR, open Chrome, Firefox or Safari browsers (iOS users – please use Safari only).
To add a new client to the client list, click the “Add Client” button.
In the pop-up window, fill in your client’s name. If you would like, you can also select their country from the drop-down list, and/or add their email address.
Once you’ve finished entering the details, click the “Create Client” button, and the new item will be added to your list.
To edit an existing client card, click the “Edit Client” button next to the client’s name (the pen icon button). A pop-up window will open where you’ll be able to edit the details you’ve entered before or delete the item from the list entirely.
Part 2 – Inviting a Client to Join a remotEMDR Session
Sending a session invitiation link to your client can also be done through the client list. Follow these steps to send your clients an invitation:
First, click the “Copy Session Link” button next to your client’s name (the link icon right next to the “Start Session” button).
Go to your email inbox and create a new message addressed to your client. Paste the copied link by right-clicking your mouse and selecting “paste” from the drop-down menu, or by typing Ctrl+V or Command+V on your keyboard.
When it’s time to start the session, your client can click this link to join it.
Please note that this link is reusable, so there is no need to resend it to the client for each new session. Just ask them to save the link and click on it every time a new session is about to begin.
Would you like a visual demonstraion? Click below for a video tutorial on the client list and invitation link.